I love the way quilled spirals catches light and shadows differently than all other quilling shapes. They can be glued straight or curved – both methods add a unique texture to quilled cards.

There's an organic play in the shape that is so intrinsically playful and interactive.
This quilled Easter basket card is from my book, Pretty Quilled Cards, which is now out of print.

Quilling spirals is a fun and easy way to add a different twist to your quilling projects.
Watch the Quilling Spirals video tutorial on YouTube:

Tutorial Steps

Step 1
Soften the end at an angle (optional - this is just what I do).

Step 2
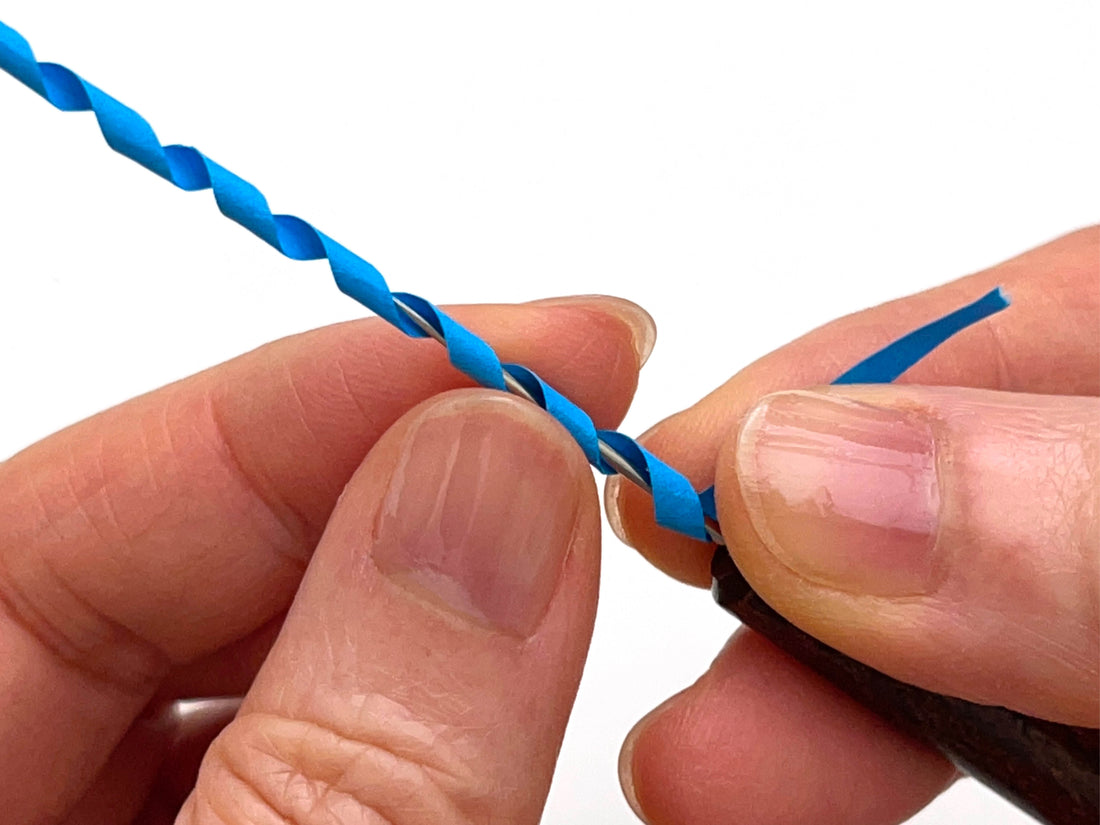
Lay a quilling needle tool on your strip at a 45° angle.

Step 3
Lightly pinch the paper with your right (or left) index finger and thumb, while resting your digits against the top of the quilling tool handle. The remaining fingers will grasp the tool and prevent it from moving.

Step 4
Using your opposite index finger and thumb, apply pressure against the paper around the needle, while sliding the spiral off the needle tool. When I'm doing this, the friction I feel is similar to rubbing glue off my fingers.
OPTIONAL: try using paper with color on one side and see how it easily makes a two-toned spiral.

Step 5
After spiralling a length of paper, take the paper off the needle tool and assess the spirals. If you have large, uneven gaps between spirals, twist the spiral tightly and allow it to uncoil. This helps the spirals even out.
OPTIONAL: try spiralling two colors at a time.

Step 6
Trim the spiral to the length you need for your quilling project. Apply glue along the segments that will be touching your work surface. I will often glue small portions down at a time, so that I can control the curve or final design I'm trying to achieve.
OPTIONAL: try making a candy cane gift tag by snipping two corners of a rectangular sheet of card stock and hole punching in the middle.
