I saw a pink poppy on Pinterest a couple years ago, and immediately wanted to quill it. Here's how I made it.
Paper Used
Daiso is a Japanese $2 dollar store. I adore their paper and I'd use it more if they had more colors.

The colors are grouped in "warm" and "cool" and offer a great range of shades in soft colors.
The paper weight isn't listed, but it's heavier than standard quilling strips, and yet it's flexible enough for me to make my tight coils without splitting or separating.

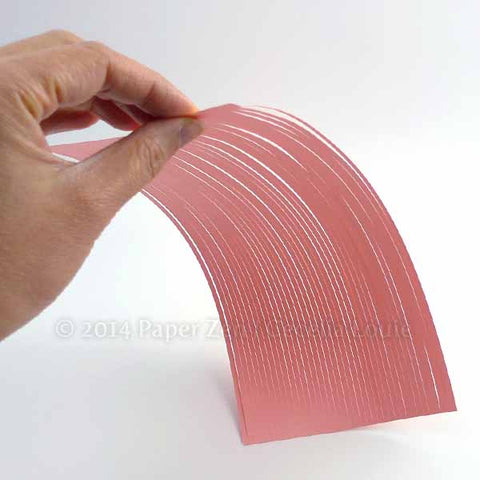
I use my electric die cutter to cut lines in the paper, just shy of the ends so they stay in behaving sheets. Here are the 3 colors I've chosen to use in my poppy. I worried the dark one was too salmon, but it didn't look too bad when in place after all.
If you'd like to cut your own quilling strips, here are tutorials showing how to do it by hand or by electric cutting machine.
Step 1 - Trace Outline

I printed the photo at 11x11 inches to fit a square Ikea frame. Placing tracing paper on top of the photo, I traced the outline and deepest lines. Then I placed a sheet of 80 lb text weight white paper on top of the tracing paper so I could shine a light behind it.
Step 2 - Crimp the Strips with Lego

Using my nephews' Lego, I crimped my quilling strip (my first attempt of random crumpling didn't work well). On the right end of the strip, you can see I've semi-straightened some areas to make the uniform waves more irregular. I tried my best to "trace" the print out with my strip.

Pinching a few of the curves made the evenly crimped strip a completely different animal. I also trimmed all the ends to make the petal appear to be fading away when viewed from the sides.

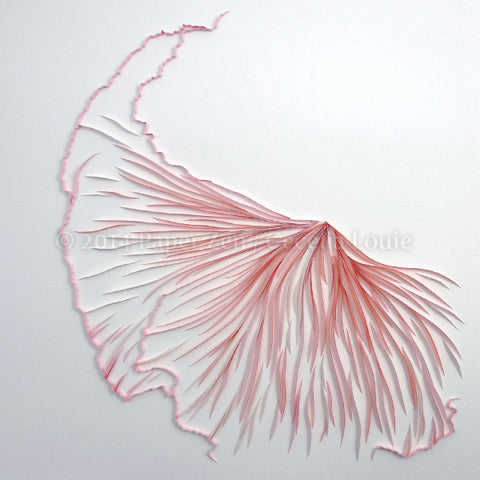
Here is the outline completed. To glue such a long wiggly strip can be a challenge unless you are an octopus and have 8 arms - OR you can glue it an inch at a time.

I cut a plastic yogurt lid into quarters and after smearing glue on the lid, I slid it under the next section to be glued, enabling me to have full control of every inch during placement.
I round the corner to make it easier to handle. The rim makes a great handle.

I have now filled in a large portion of a petal. Leaving your chair to rest your back and hands is a good practice to do every hour. Leaving your work a full day helps you view it in new eyes. When I now look at the lines, I wish I had made my lines a bit more wrinkly. I think it won't matter overall when I'm done, but I think the crinkly bits makes it more fluid and realistic, less rigid – you can see I've done that as I worked my way outward.

Step 3 - Taper Ends
I hand cut all the ends because I think the tapered trimming makes it look lighter in those areas. To be efficient and save glue, I amass a few strips at a time until it starts to get confusing, then glue at one time.

Although I cut my strips 1/8", I deliberately hand trimmed some to be less in height to make it appear to be fading into the light.

Here's a close up to show how the 3 shades are working with one another.

For the strips that touch the outline, I dip the length in glue, then turn it on its side to dip the short end at the same time. This way I adhere it to my surface and my outline at the same time. Tweezers are a good thing here.
Step 4 - Fix Missed Quilling Glue Spots
Uh oh! Do you see what I see? One end didn't get pressed while the glue was wet and now it's loosey-goosey.

To fix it, I just take a spare strip and spread a thin thread of glue.


Besides using a yogurt lid, I quite like using this plastic division separator. It came with my $6 fishing tackle box which I use for quilling paper storage. If you look closely between this surface and the yogurt lid, you'll see the glue does not pull together and bead on the blue divider, as it does with the yogurt lid. Not sure why it does this – I guess it's the type of plastic?
I prefer the divider because I like dipping my glue in as flat a glue puddle as possible because I can still see dry glue that has ridden up the sides if I were to inspect closely. When I dip into the yogurt lid, the height is just slightly more noticeable, even though I am squiggling back and forth the same way and releasing the same amount of glue. Can you see how thin I can make it on the blue divider? You can practically see how I've drawn with the glue. The yogurt lid has the benefit of being flatter to slide under items. Both are great for re-using by peeling off dried glue "skin".
Step 5 - Filling in with Strips
At this point, I'm using the darkest strip to make this petal part more dense. Somehow I can show it better from an angle though.


More progression...

Here's another thing I'm noticing about what I'm doing. I kind of outline with the darkest strips first to give myself a visual guide. Then I fill in with the medium and light strips. However, when I'm not consciously thinking, I notice my filling happens in the middle. So I deliberately make some strips closer to each other and not quite so parallel to give it a more random pattern.

Another example where I place some strips deliberately closer rather than in the middle.

I would make my general outlines with the darker strips first.

Then I would start filling in with the medium pink.

Finally I would add the lightest strips.

I think the light strips were my favorite because some were practically slivers and I enjoy that organic shape rather than always have a straight edge on top.

To make them, I would hand cut the slivers from a cut strip, turn the strip over, and continue cutting slivers. After making a pile, I'd be ready to sprinkle them throughout.
Step 6 - Tear Ends

When adding an end to an existing strip, I would tear the end and dip not only the edge, but that tail into glue. After setting it in place, I'd follow up the join with a good squeeze from my tweezers. It may seem overkill, but I find this makes the join much less noticeable than a cut end.

Besides the light slivers, I've been anticipating the light green grass the most. I trimmed these down using a ruler after figuring out the length. My eyes have always gone to that subtle detail in the photo.

I thought I was restraining myself during the process, but now that I'm done, I wish I had held back more. I thought the outline would continue to stand out, but now that it's filled, I'm losing it amongst the busyness. Oh well, can't remove it now.
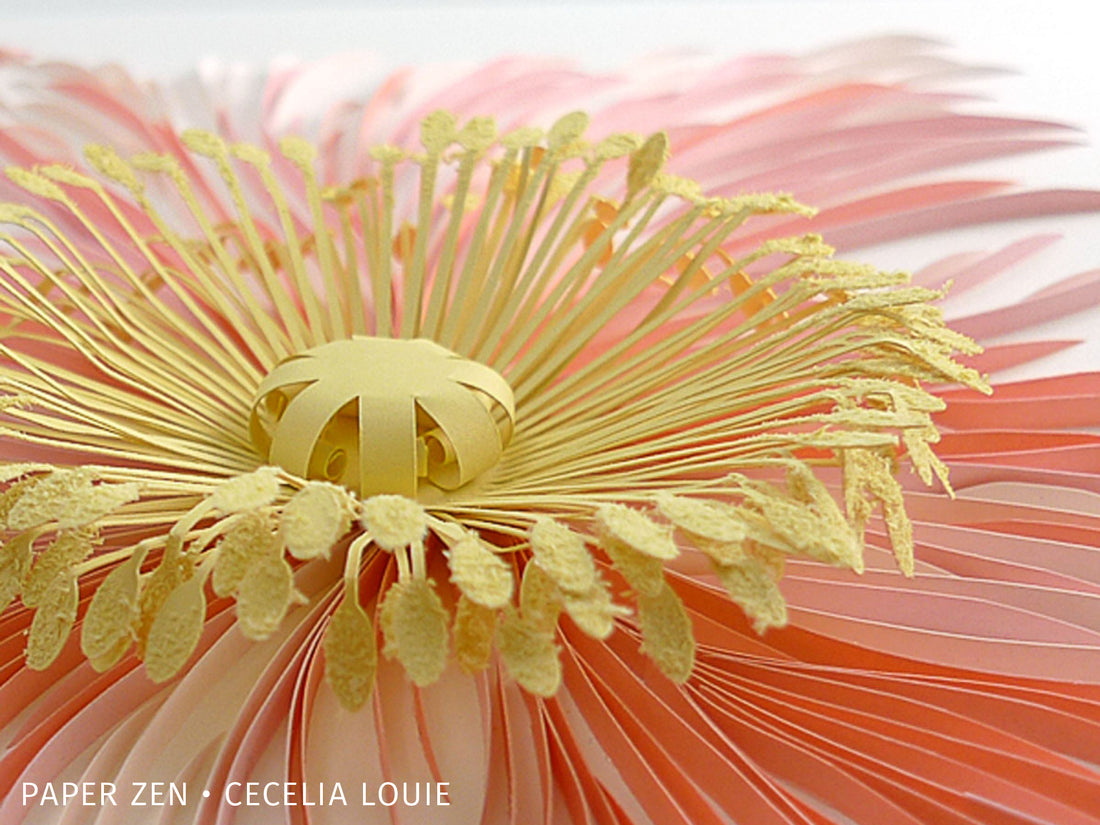
Step 7 - Stamens


So I cut one of the circles into 3 parts to deliberately offset the stamen lines. Next I borrowed my cheese grater and grated a rolled up piece of matching yellow paper and proceeded to grind away. UHU glue stick was smeared on just the tips, then dipped into the "pollen".
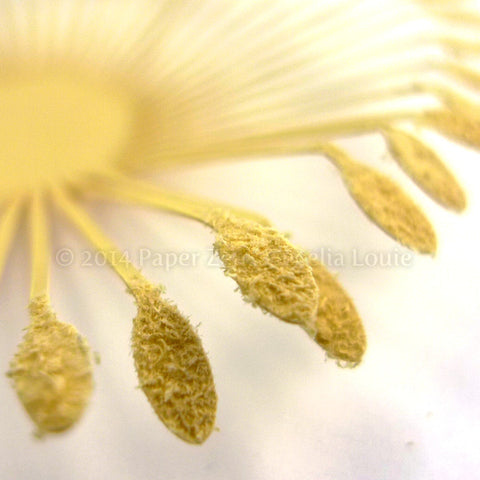
Here's a nice close up for you to see.


To make the middle crown, I cut a piece of radiating lines, then curled them all inward and nestled it within the stamens.

It's finally done! My largest project to date at about 11"x11". I'm struggling a bit with the photography because I can't seem to make the color strips stand out as much when I shoot straight down. To achieve the photo above, I shot a bit from the bottom, and tweaked the perspective within Photoshop. This ends up showing a bit more of the strip from the side. Anyway, on to the crowning glory - the stamens and pollen.
I hope seeing this progression inspires you to tackle a large project!
